![]()
| SVCD mit Chaptern erstellen - TSCV Methode |
|
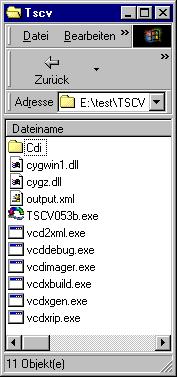
download TSCV
and VCDImager
and copy both in the same directory.
When you want to make a VCD(CDi) you must have a CDi directory. You can copy
it from a CDi or download it form the web.
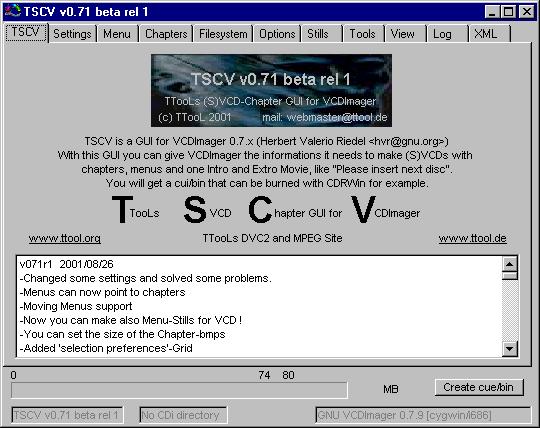
This guide is for TSCV 0.71 rel 1. This Version should be run with VCDImager
0.7.10 or higher.
Start TSCV. On this Page you can see the changes and bugfixes.
The Settings Page
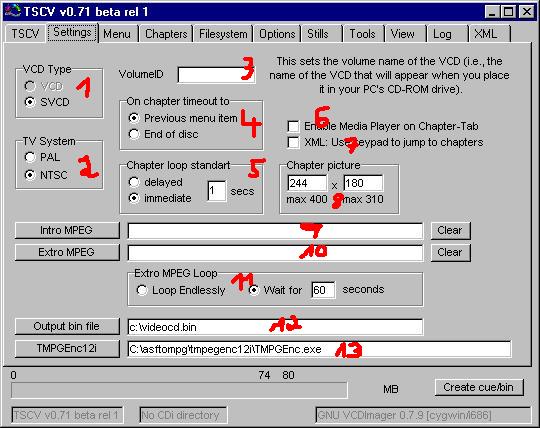
1. Here you can choose what kind of CD you want to create.
2. Here you can select your TV System.
3. The VolumeID is the Name of the CD that you can see later in the M$Win Explorer.
4. Chapter Timeout: Where should the CD go after the MPEG finished playing?
To the Menu, or to the CD end.
5. Chapter loop: Should have this settings.
6. Here you can enable the Windows-Media-Player. If your computer will not work
with it, disable it.
7. XML Use keypad: If you activate this you can jump between chapters be using
the numpad. If you deactivate it you can only use << >>.
8. Here you can set the Chapter-Pictures size. Chapter-Pictures are Pictures
that you can create on the Chapter-Page. More on the Chapter-Tab Guide.
9. A Intro Movie is the first movie on the CD.
10. A Extro Movie is the last movie. for example: "Insert next dics"
11. Extro Loop: What should happen when the Extro is finished? Should the playback
end after XX secunds, or should it loop endless.
12. Here you must set the Output-bin. When you click on "Create
CUE/BIN" the output will be written there.
13. Here you have to set the TMPEGEnc.exe - file. Used to generate Stills (Menus).
More at the Stills-Tab guide.
The Menu Page
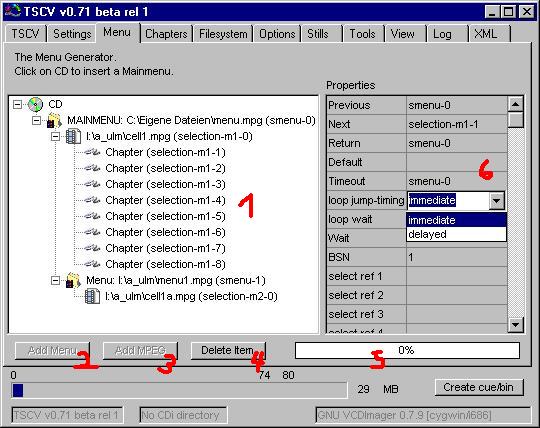
1. The Menu Window: Here you see the Menu structure.
2. Here you can add a Menu (Still or Motion). VCDImager 0.7.10 will parse the
Menu if it is a Still or a Motion. At (5) you can see the progress.
If you enabled VFAPI in the Settings-Tab,you must also select the AVI. (what
is a VFAPI?)
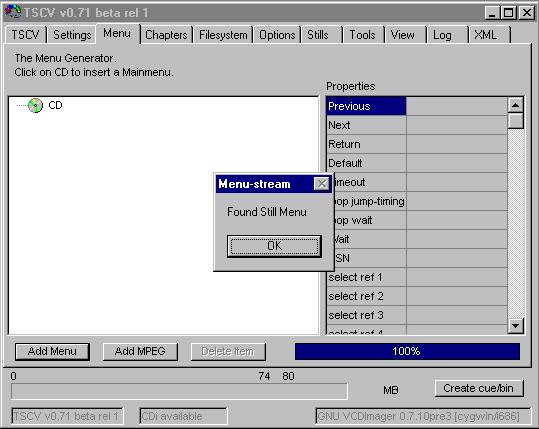
3. Here you can add a MPEG-Movie. You can only add MPEGs to Menus.
4. Here you can delete a Menu, a MPEG, or the whole structure under the selected
Item.
5. The Menu-Parse Bar.
6. Here you can change the settings (Please do this only if you know the XML
structure)
The Chapters Page
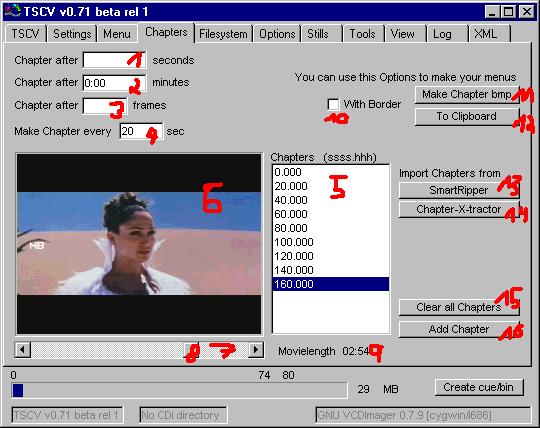
if you have mediaplayer disabled, then enter a movielength (9) manually and
then you can use (1..4)
1. Create a Chapter after XXX.XXXX seconds.
2. Create a Chapter after XX:XX minutes.
3. Create a Chapter after XXXXX frames.
4. Create a Chapter all XXXX seconds (Only functionally when (9) Movielength
works) Working on that.......
5. Here you see the Chapters. You can delete them with the DEL-key.
6. The Movieplayer.
7. If you click on this position you go 1 sec forward. If you click on the other
side you go 1 sec back.
8. The scrollbar. Here you can go to every position in the Track.
9. Movielength: The Length of the MPEG-Track.
10. With Border....see 11. The Picture comes with a grey frame.
11. When you click here the current Picture (6) with the size you set on the
settings-tab will be saved as a bmp and Paint will load it.
12. When you click here the current Picture (6) will be copied to the Clipboard.
13. Here you can import Chapters from SmartRipper.
14. Here you can import Chapters from Chapter-X-tractor.
I am currently working on improvement.
15. Delete all chapters in the (5) Chapter-Box.
16. Add the Chapter where the MoviePlayer is.
The Filesystem Page
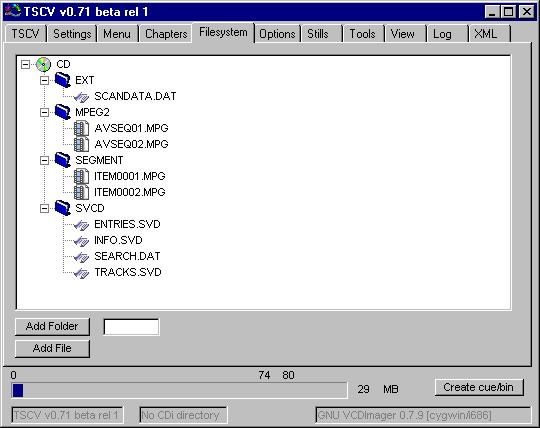
Here you can add folders and files to the (S)VCD.
The Options Page
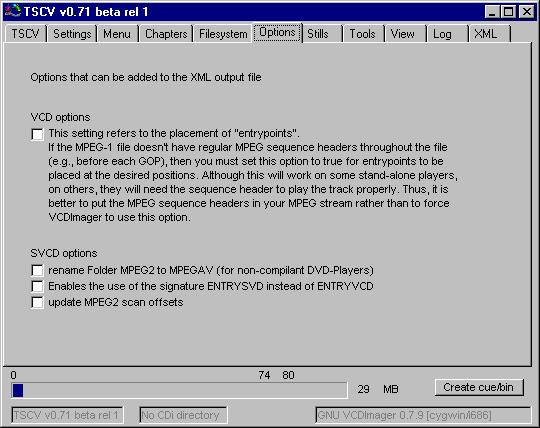
Should speak for itself.
The Stills Page

1. M$Paint starts with a black picture and has the settings used for the type
of CD you are just creating. You can use the Chapter-Picture function to copy
the Chapters to the Cipboard and past them here. How ever you want. Maybe you
want to paint something.
2. Here you open the prior made
bmp and TMPGEnc is called and will produce a mpeg-stram. (Choose at the Settings-Tab:
EXE-file of TMPEGEnc 12i)
3. The prior produced stream must now be patched to 0xE1. Because the Index
0xE0 stands for moving pictures and 0xE1 stands for Still-streams.
4. If you click here M$Paint will load a standart-front CD cover. You can save
your own templates here.
5. The Back-Cover.
The Tools Page
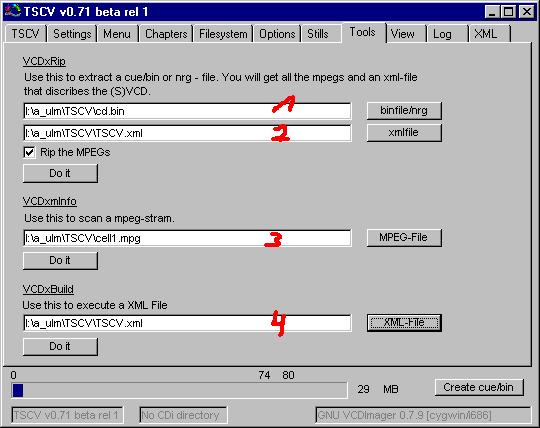
1. Open here the bin-file you want to rip.
2. Here you must specify the xml file.
3. Here you can open a mpeg and then parse it.
4. Here you can open an XML and when you click on DOIT the cue/bin will be written
to the bin file you set on the setting-tab.
The View Page
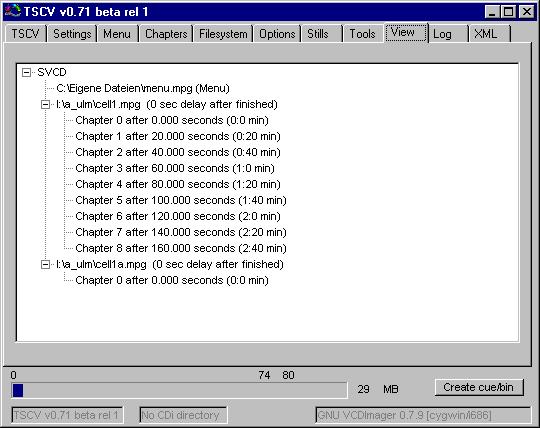
Only the view of the current project.
The Log Page
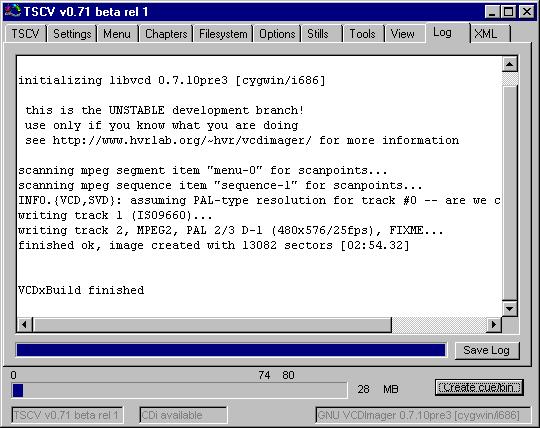
Here the VCDxBUILD output will be displayed, after you click on Create Cue/bin.
If there is only Start..Nothing...End, you may not entered a bin file, on the
Settings-Tab or the XML has an error. Please send me the XML, that i can find
the error.
The XML Page
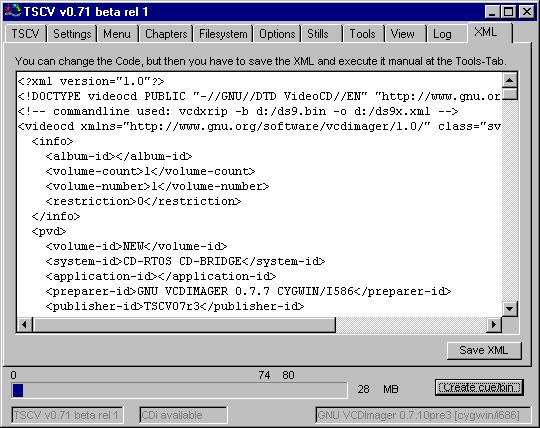
Here you can see the XML of your project. You can change the code, but then
you have to save it and execute it from the Tools-Tab.
TTooL 2001